An API (Application Programming Interface) call is a way for one program to ask another program or service for information or to perform a task. It works by sending a request over the internet, often using methods like GET (to get information), POST (to send information), or DELETE (to remove something). Many programming languages, like Python or JavaScript, make it easy to perform these requests using tools like Python’s ‘requests’ library or JavaScript’s ‘fetch’. To make an API call, one needs to provide the URL of the service, the type of request, and sometimes additional information like data or login details.
In QuPath, which is software for analyzing images like tissue slides, API calls can be used to connect QuPath with other tools or systems. For example, users can write scripts in QuPath to send or receive data, such as downloading images or saving analysis results to an online database. QuPath supports scripting with languages like Groovy or JavaScript, and users can use built-in tools or Java libraries to make API calls. This makes it possible to automate tasks and build more efficient workflows for analyzing and managing pathology images.
This document presents a method for integrating Biodock with QuPath, that is with the help of API calls. Scripts were written for making these API calls and are discussed in a subsequent section of the document.
Choice of language
QuPath supports script execution in two languages: Groovy and Jython. While Jython is simpler than Groovy, the scripts discussed in this article were written in Groovy because it comes preinstalled in QuPath along with many of its necessary packages. Additionally, running Jython scripts in QuPath requires installing additional software and modifying settings.
In a Windows version of QuPath (e.g. 0.6.0-rc2), these Groovy scripts can be executed by referring the following steps:
I. Automate Menu -> Script Editor
II. Language Menu -> Groovy (select)
III. File Menu -> Open (a script)
IV. Run Menu -> Run
Scripts for API calls
The first script (Script 1) to make an API call to Biodock would be to identify the IDs assigned to the existing filesystem items created by a user. This task also requires an API key that is unique for every user. The script shown below addresses this task. The variable responseText only collects a JSON data consisting of item ID, name and type, in string format. So, it is split using an object mapper module to improve efficiency and readability. The module is com.fasterxml.jackson.databind.ObjectMapper and it simplifies converting JSON strings to Groovy objects and vice versa. It is highly flexible, supporting custom mappings, annotations for fine-tuning, and various data formats. The endpoint requestUrl represents the location where the expected resource of the API can be accessed.
After identifying the folder IDs a similar script (Script 2) with minor modifications can be executed to display only the files in that folder. A variable needs to be defined, e.g. FOLDER_ID, that can hold the ID of a folder. Then the variable requesturl should be initialized as follows: "https://app.biodock.ai/api/external/filesystem-items?folderId=${FOLDER_ID}"
For viewing active trained pipelines by Biodock, another similar script (Script 3), similar to Script 1, can be executed with a minor modification. The variable requesturl should be initialized as follows: "https://app.biodock.ai/api/external/pipelines". The script shows the following information about a pipeline: ID, Name, Description, Version, Date and Time of creation.
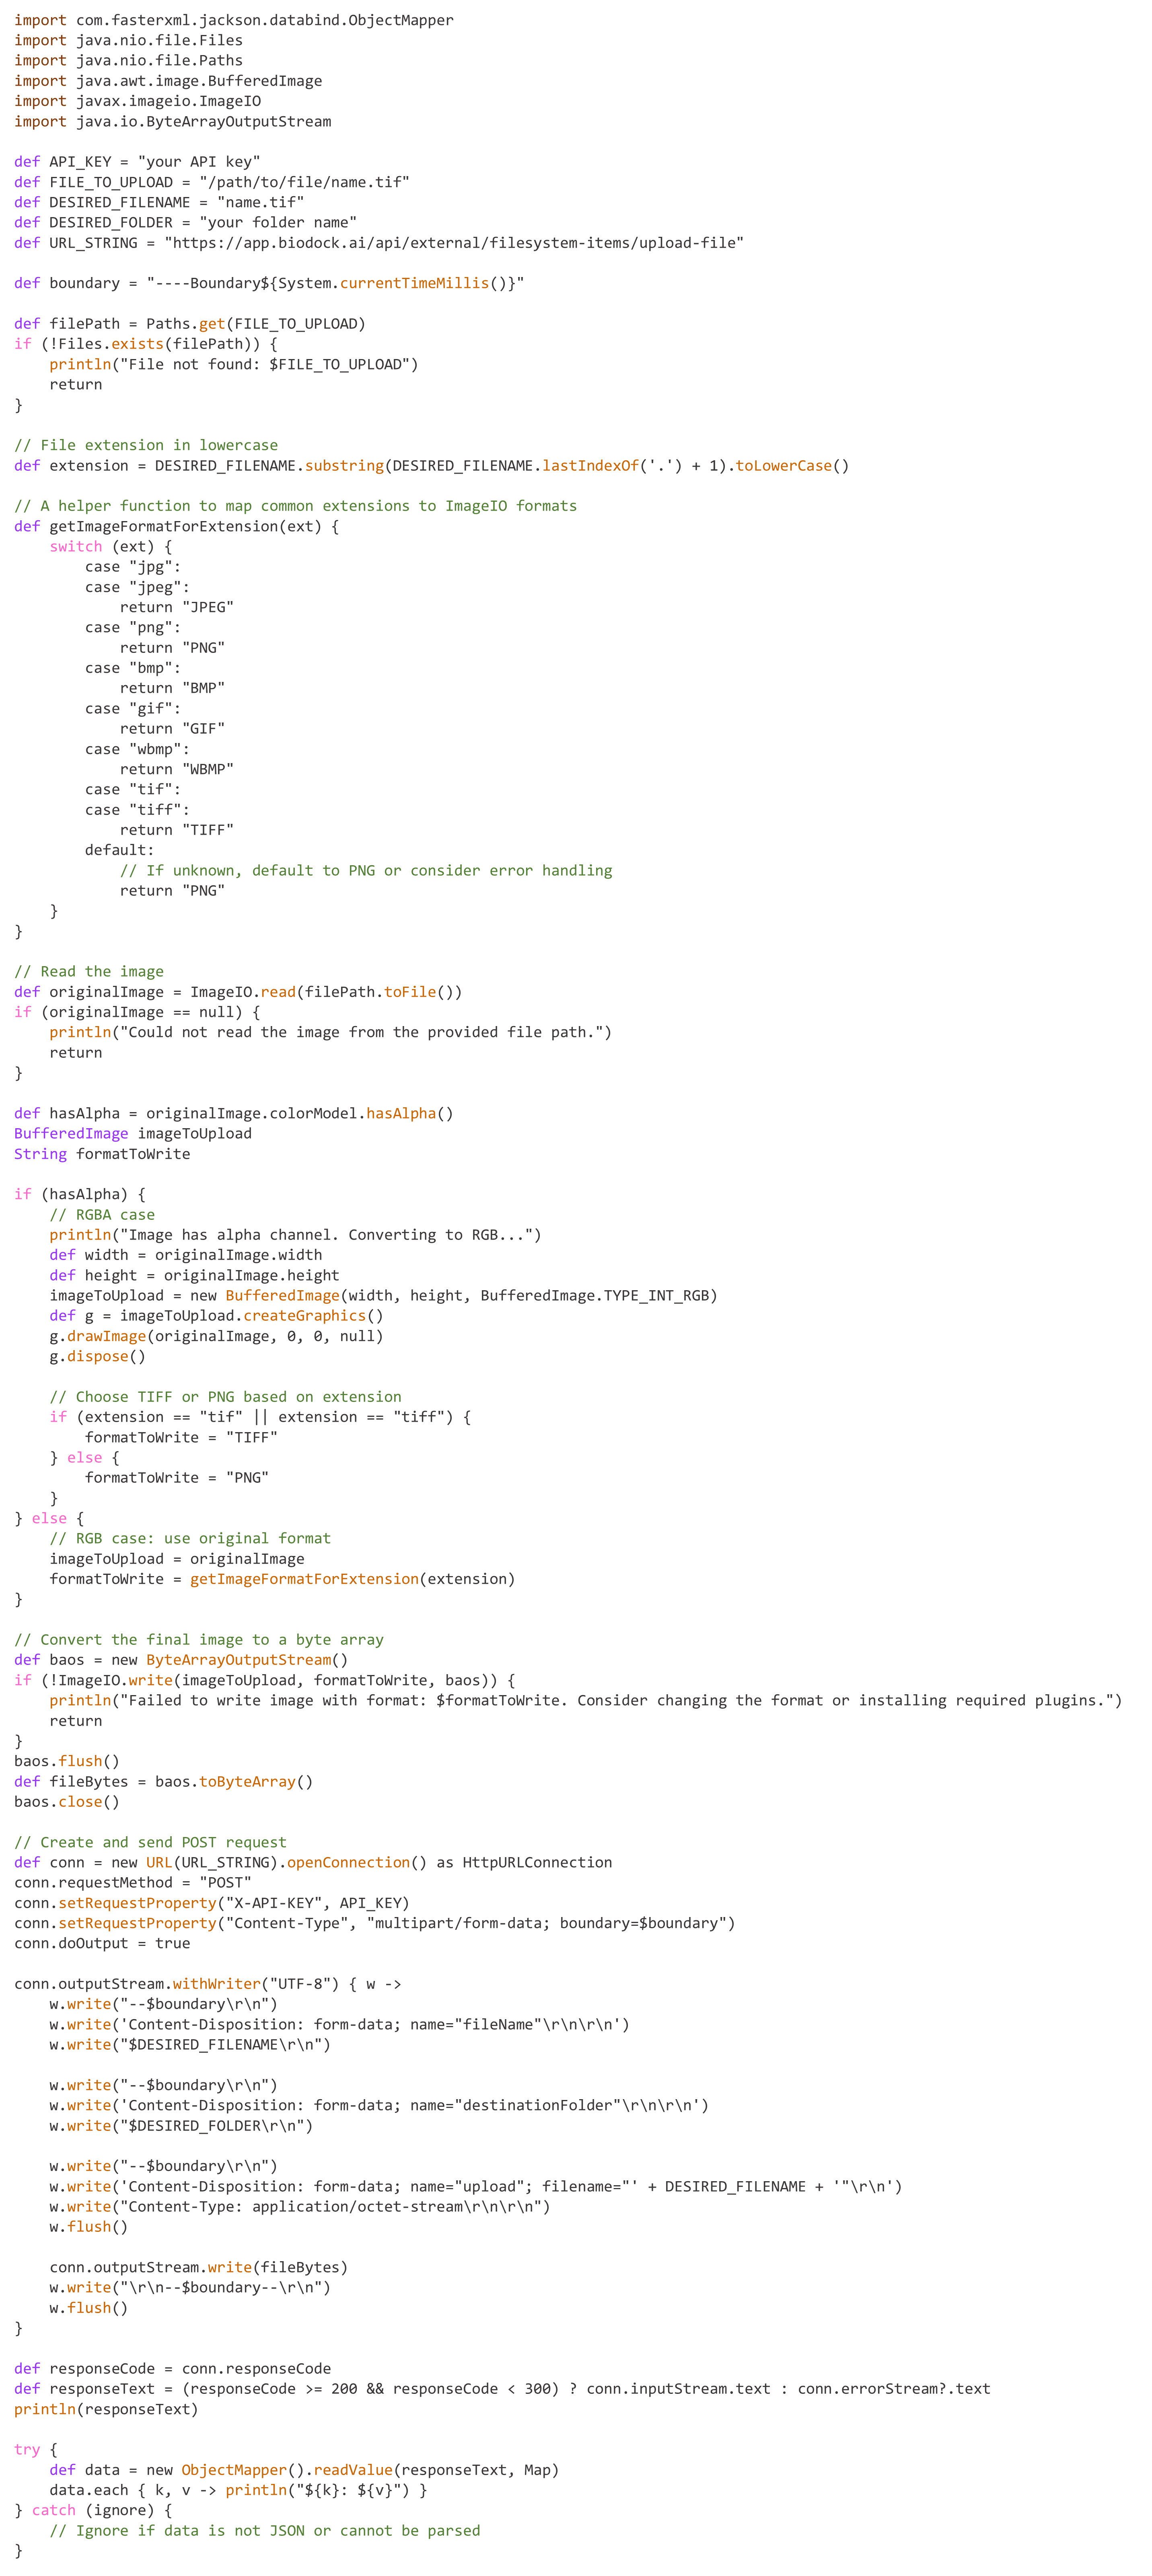
Files can be uploaded using the script (Script 4) shown below. The java.awt.image.BufferedImage module is used to represent and manipulate images in memory, allowing tasks such as processing or editing. It is particularly useful for custom image operations, like applying filters. The java.io.ByteArrayOutputStream module is used to store and manipulate data in memory as a stream of bytes, making it useful for exporting image data without writing to a file. It allows efficient temporary storage and easy conversion to other formats or direct transmission to APIs. The script also converts images with alpha channels to a normal RGB image and sets format of uncommon extensions to PNG as it avoids any major loss of data.
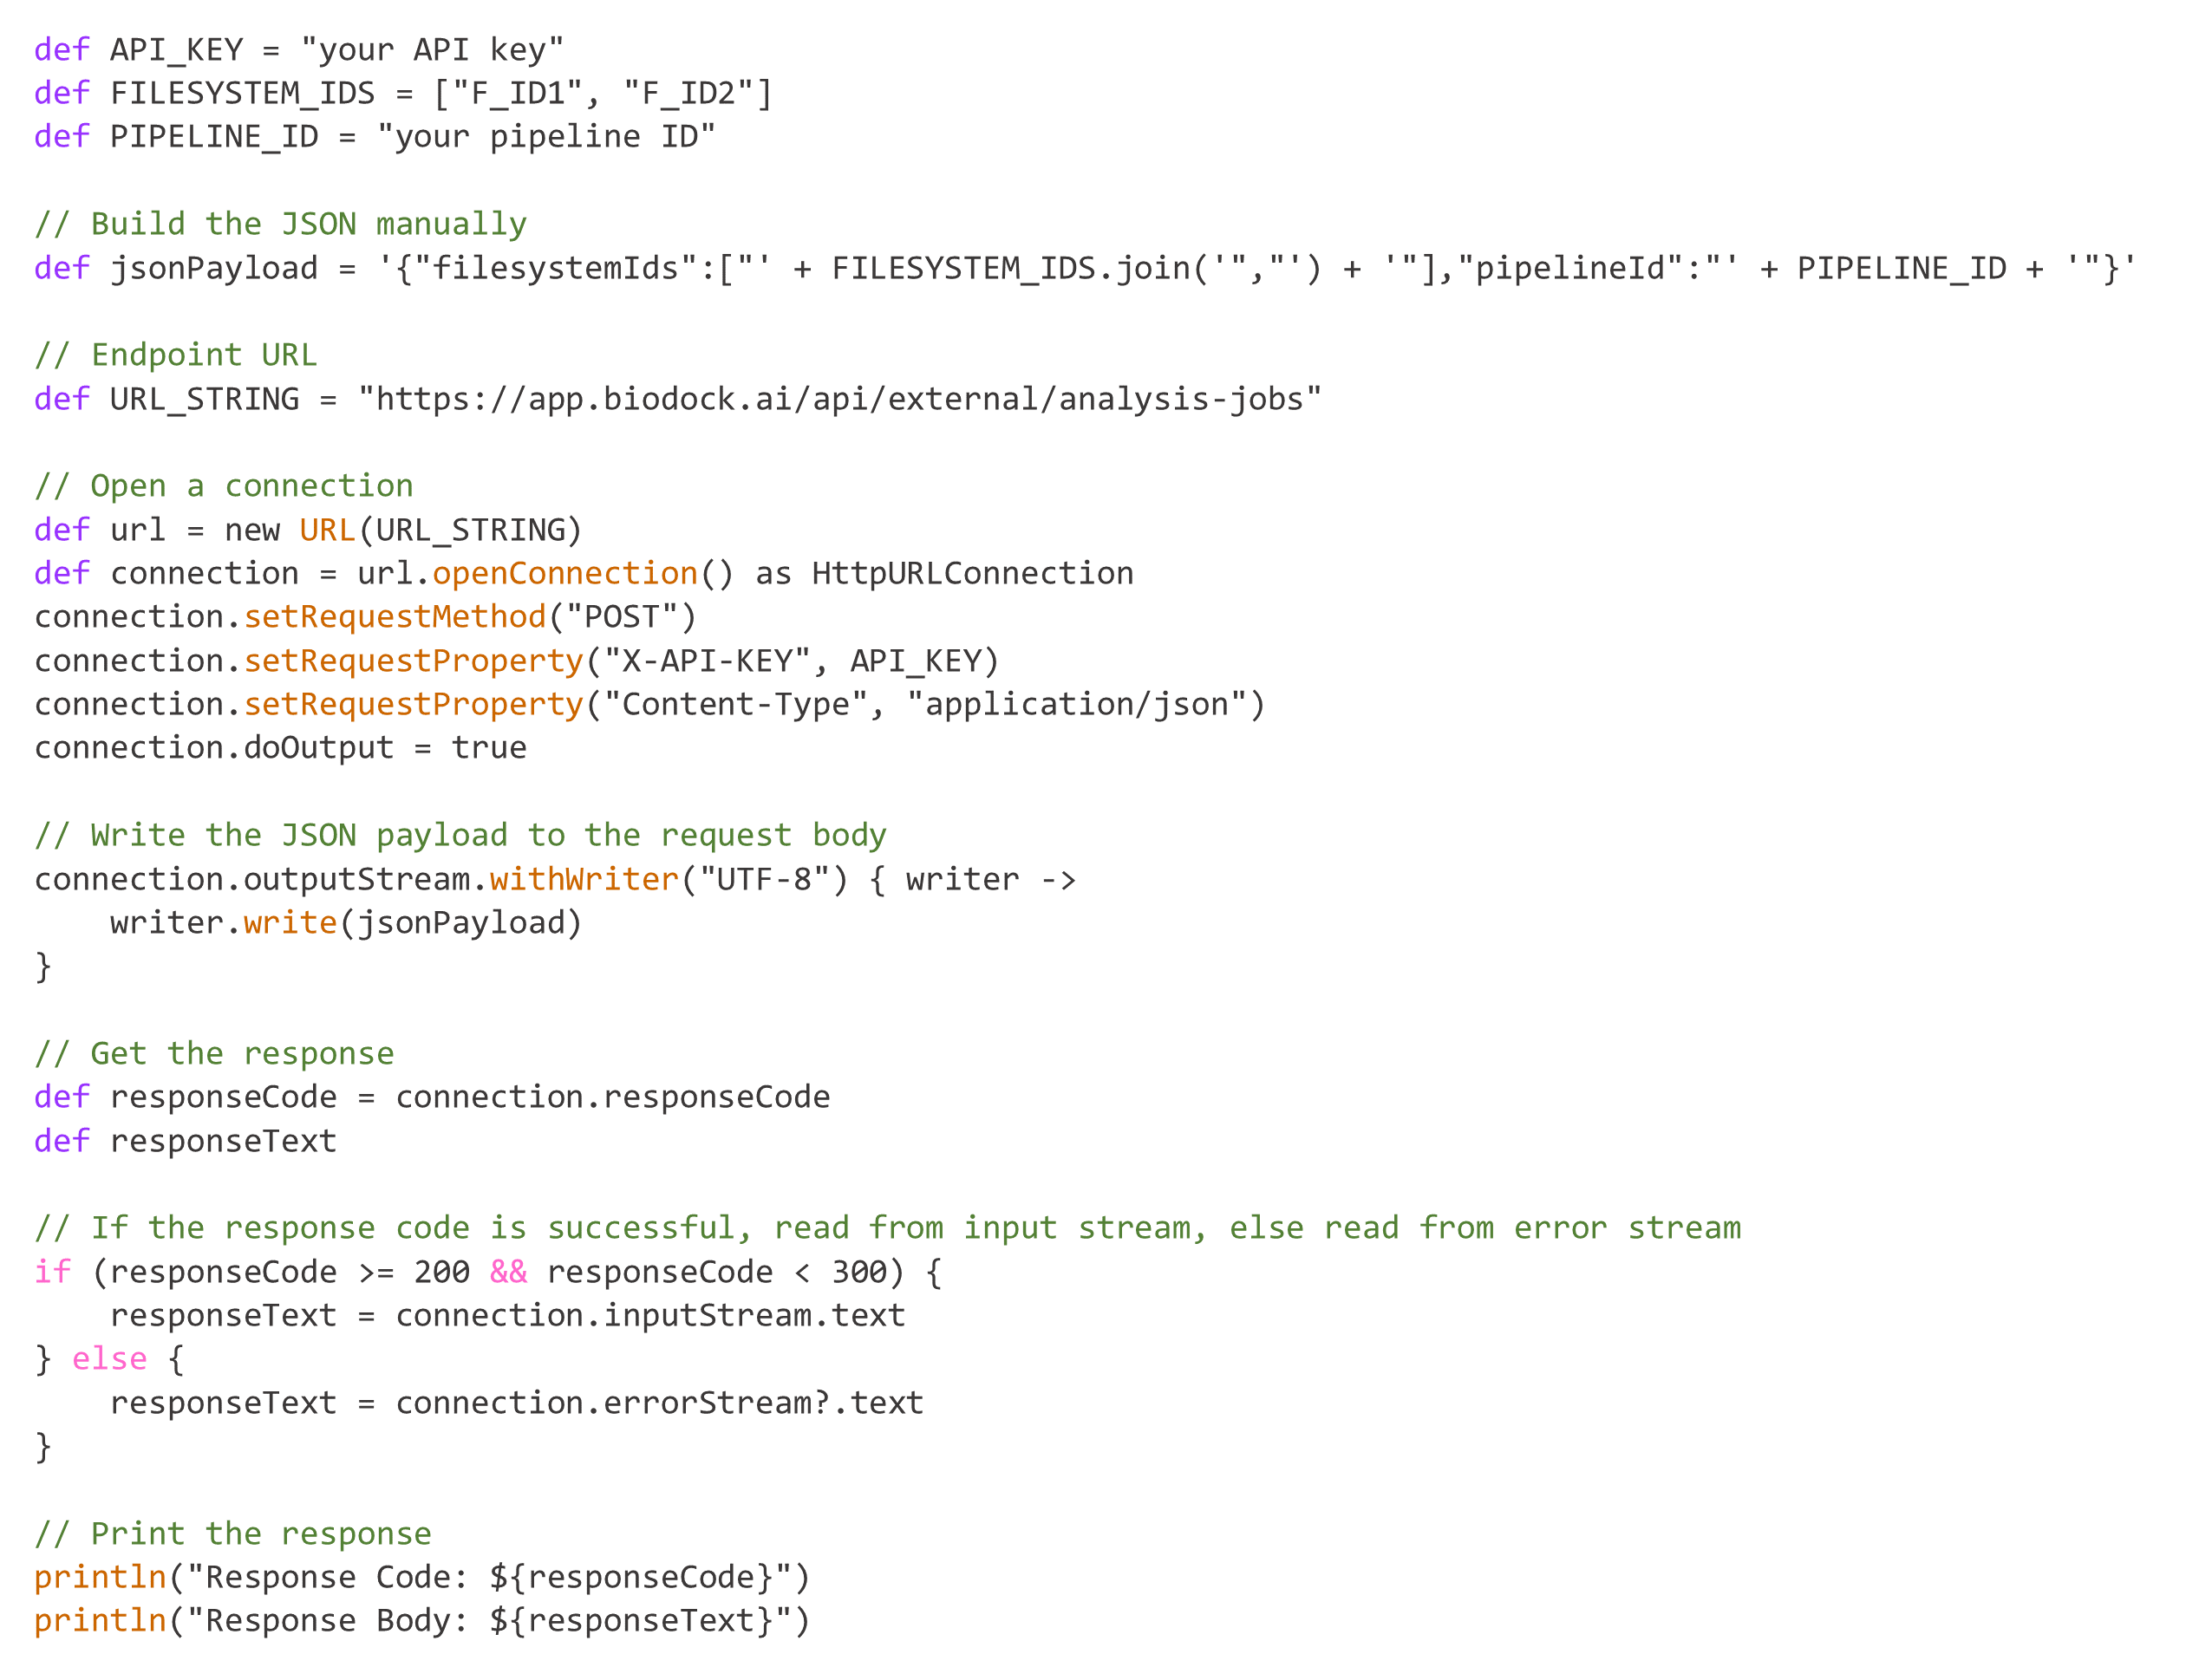
After a required pipeline ID is selected, an analysis of a file / files can be submitted using the script (Script 5) shown below. For the value of responseCode, a range of 200®299 is selected because as per HTTP specification, successful responses fall within the 2xx range. These status codes indicate that the client’s request was successfully received, understood, and accepted by the server.
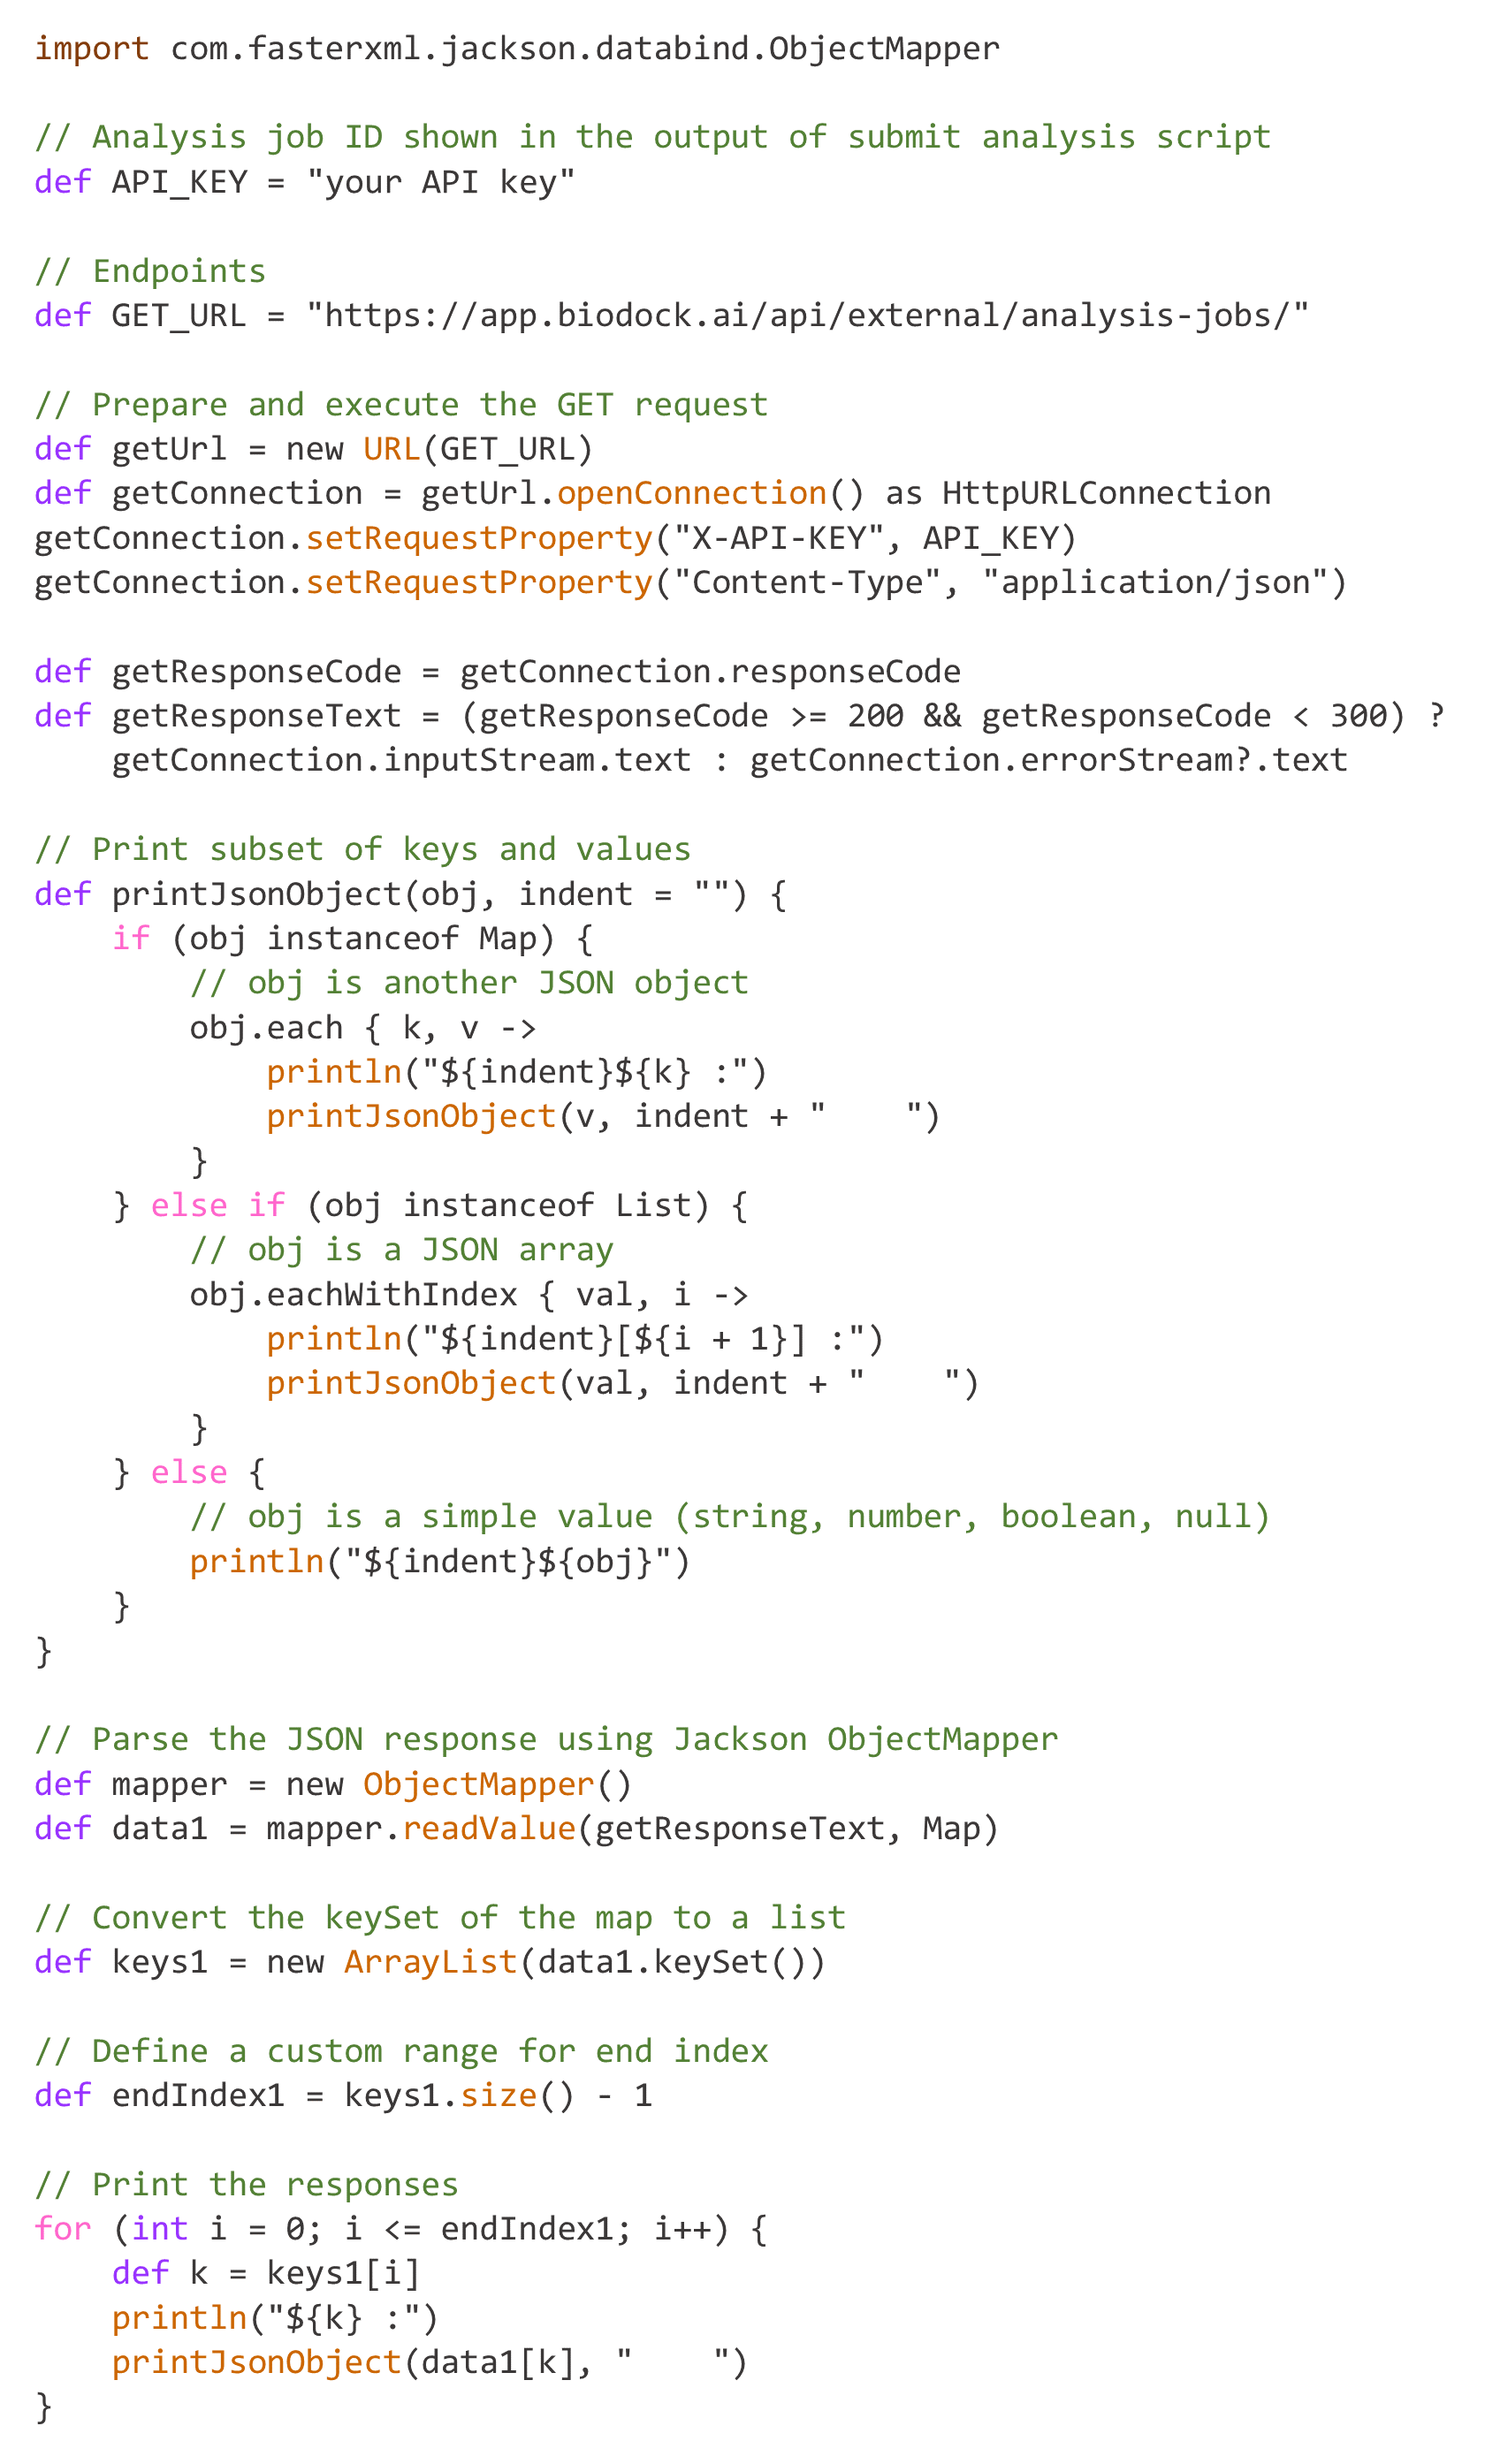
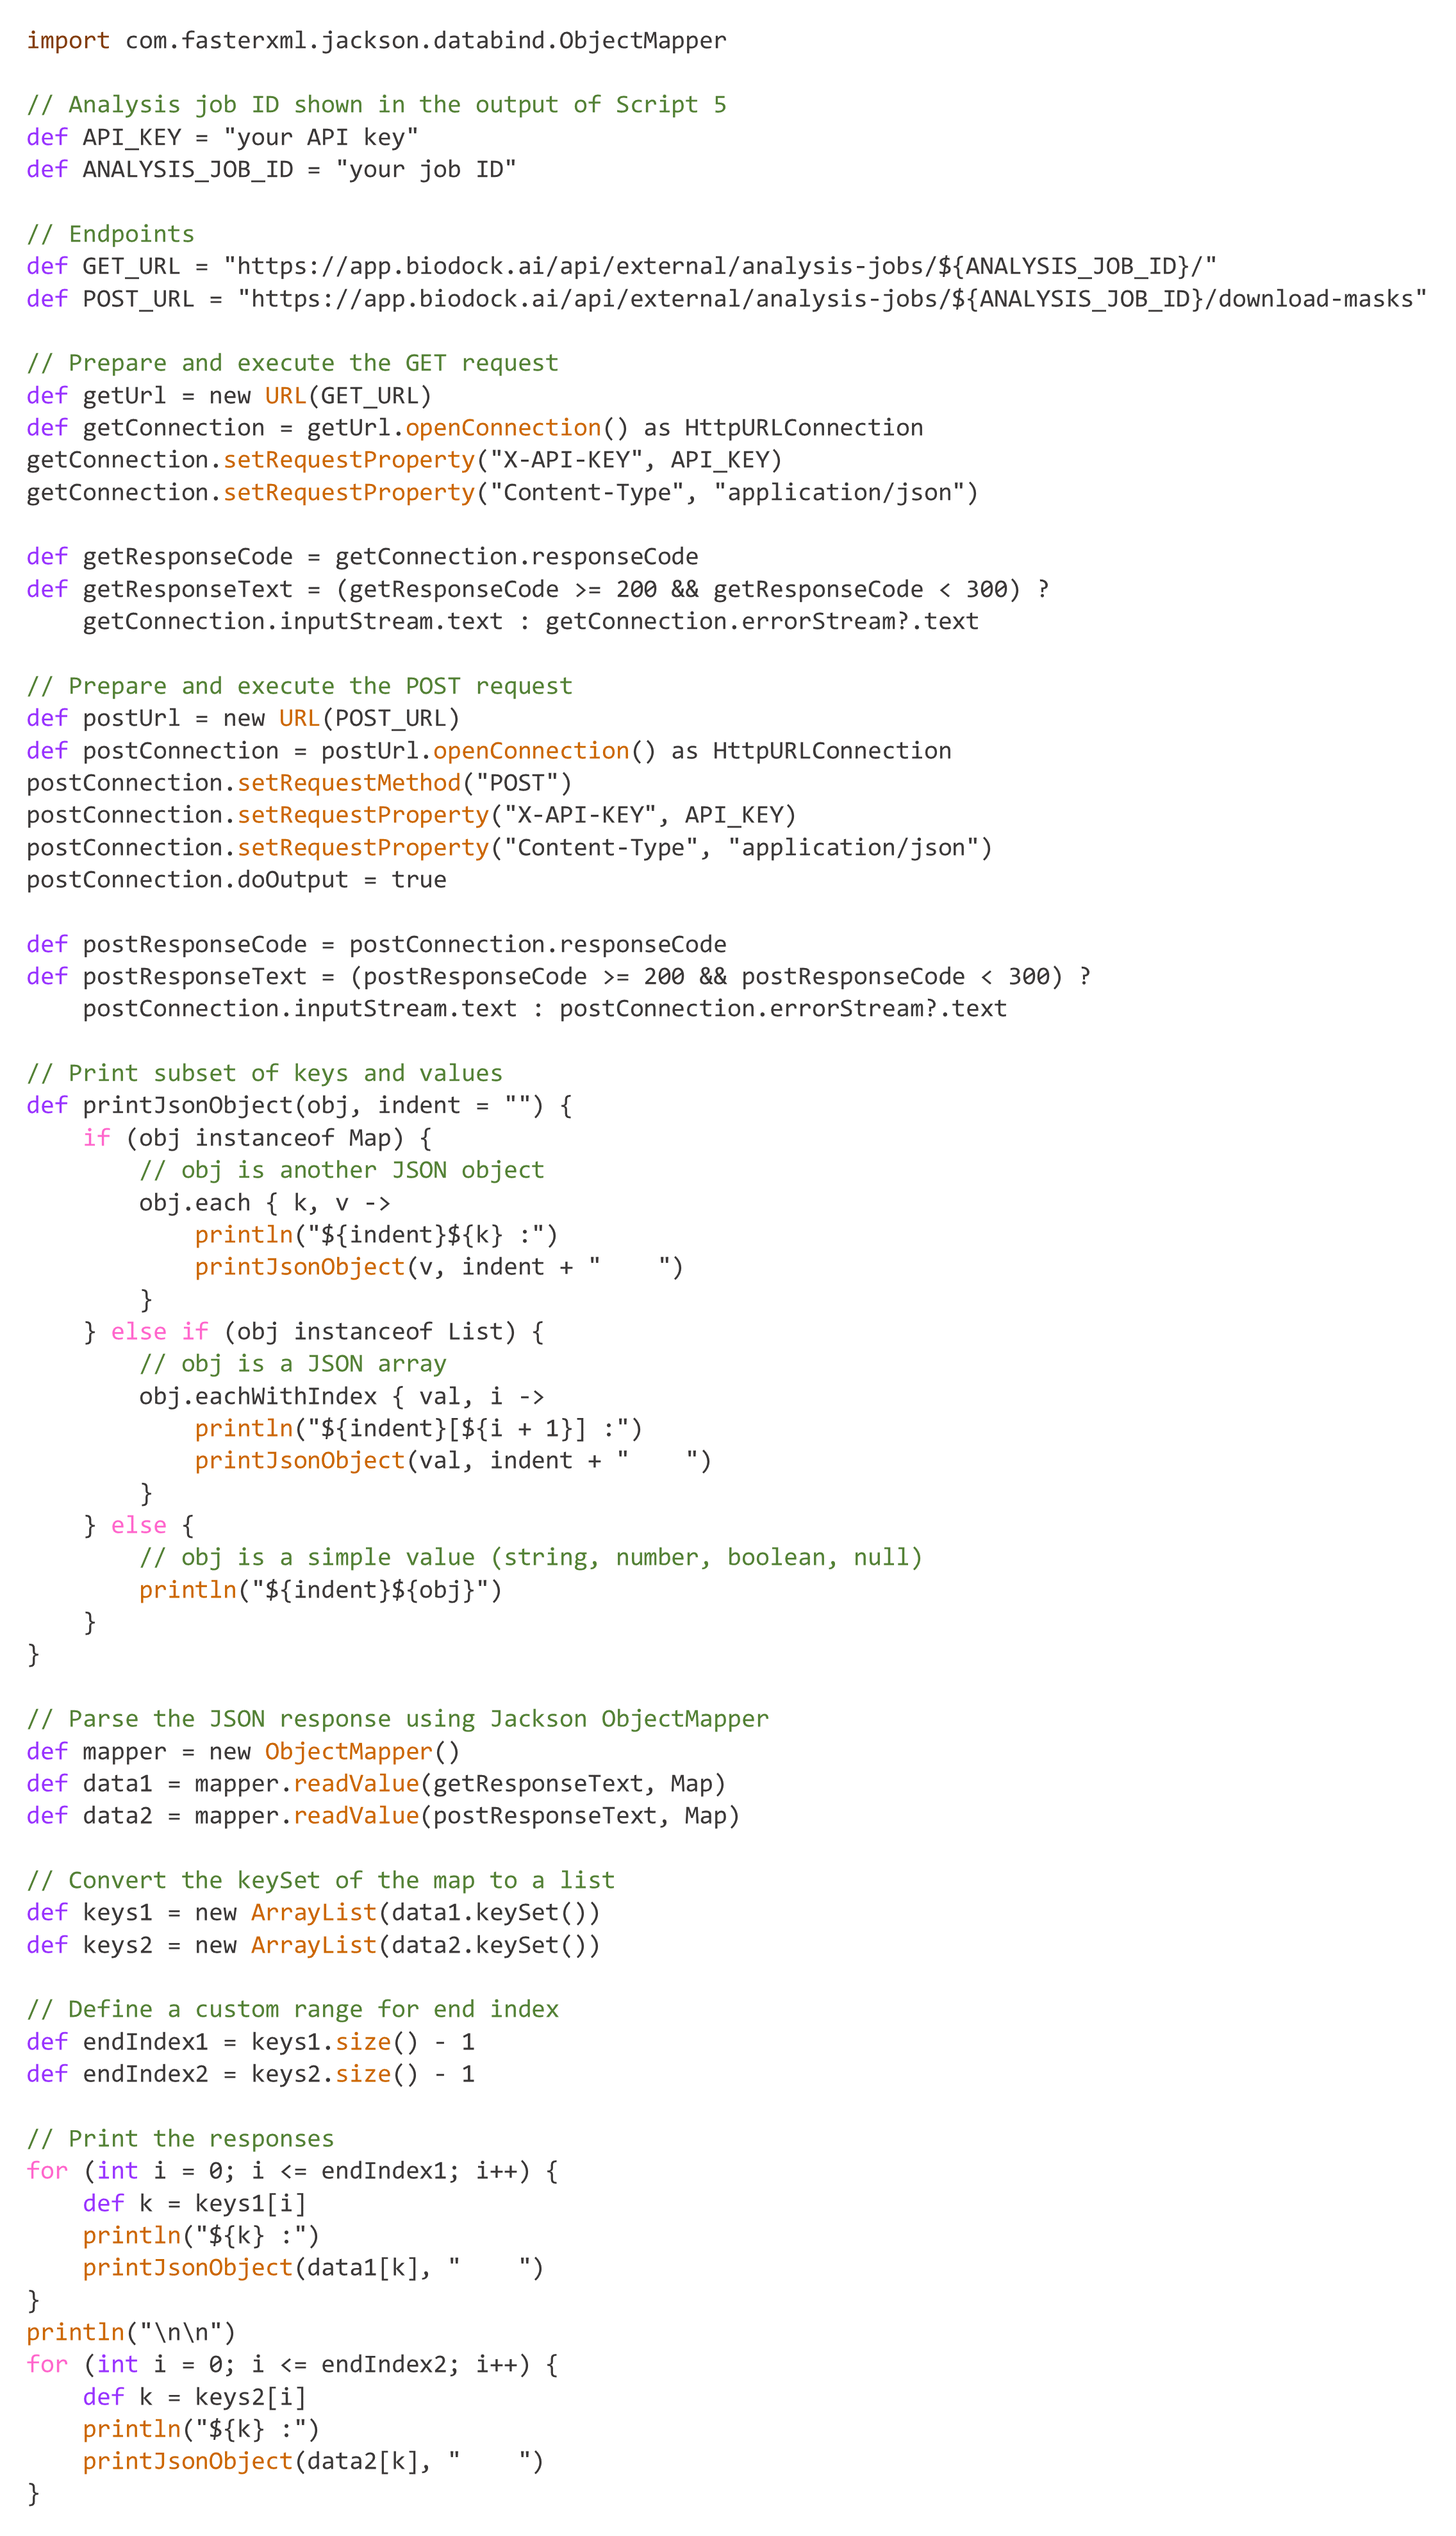
Execution of Script 5 also displays the analysis job ID of a submitted analysis. The script (Script 6) shown below can be used to download information of an analysis with the help of its job ID. It shows download links of metrics data and masks data. It can also be executed to check the progress of a job under analysis.
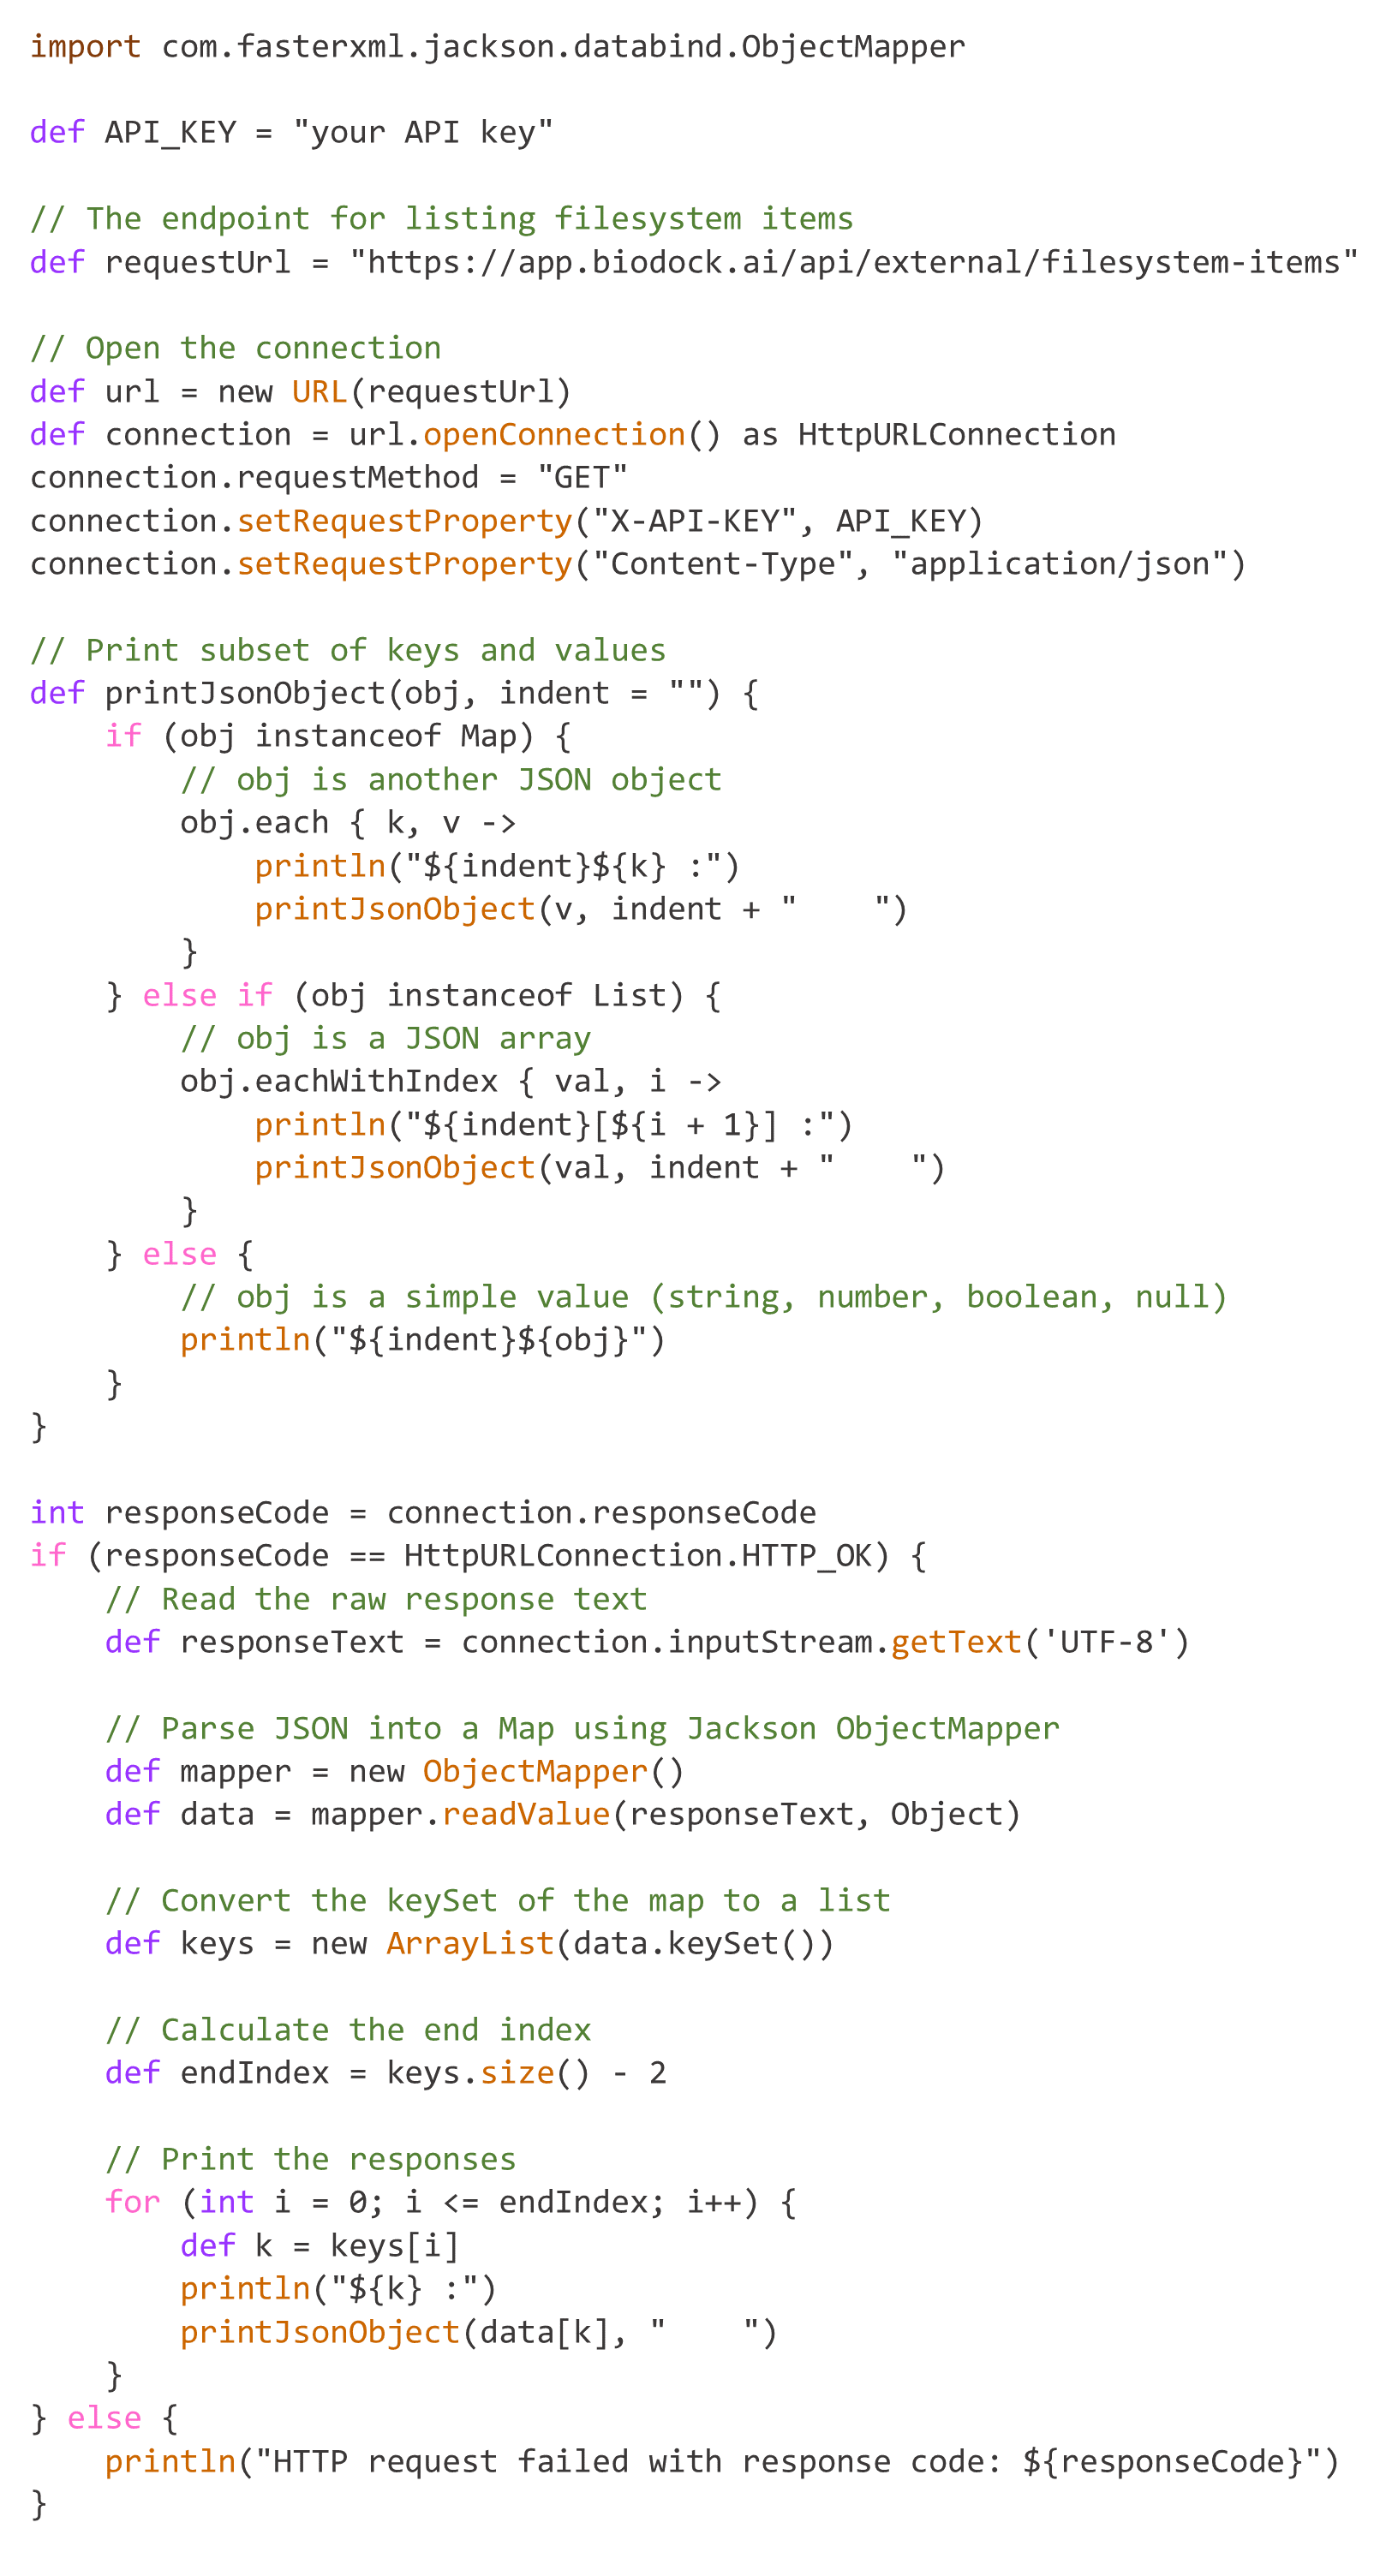
The script (Script 7) shown below can be used to check the progress of all analyses associated with an API key. It is similar to Script 6 but differs in that it does not include any IDs of analysis jobs and statements related to sending information (i.e., POST).